The HTTP or hypertext transfer protocol is a communication protocol that allows the exchange of information between a client and a web server. It is, basically, the protocol that allows Internet users in the world to view web pages.
The purpose of this post is to explain, in a very simple way, what HTTP is and what it is used for. To explain this we will use simple practical examples, with which the concepts about this communication protocol should be clear. We go step by step.
What is a web server and what is a web client?
A web server or HTTP server is software that allows the exchange of information between two computers over the Internet. An example of this type of software is Apache, a program that allows you to “create” a web server on a computer.
Some time ago I published a post on this blog about how to create a local web server on Windows using Apache. Basically by installing Apache and starting the server, our computer becomes an HTTP server.
A web client, meanwhile, is software that allows you to make requests to a web server. Some examples of web clients are browsers such as Google Chrome, Mozilla Firefox, Safari, Opera, Internet Explorer, Microsoft Edge, among others. In addition, almost any programming language has tools that allow you to send HTTP requests to a server.
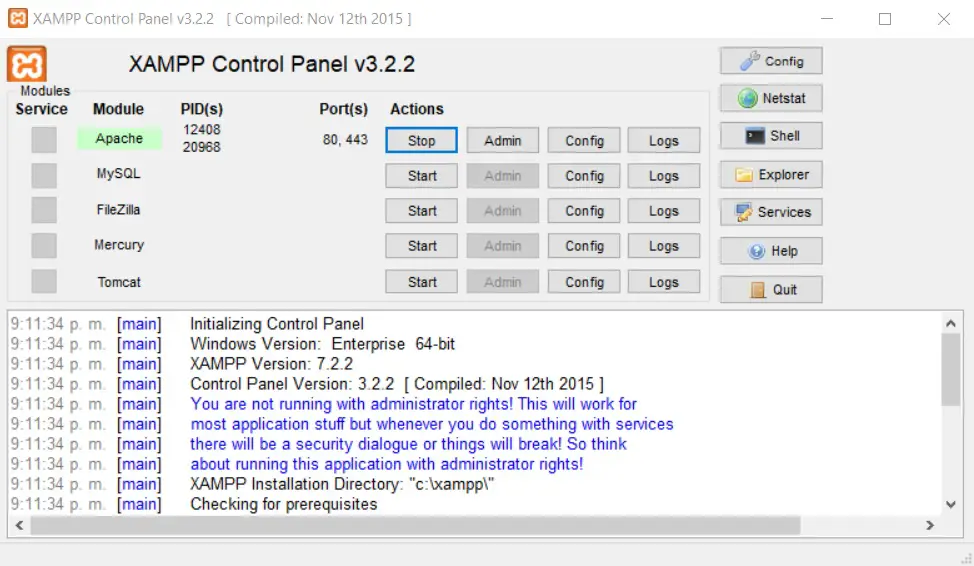
Let’s see a simple example of a working web server and client. Following the steps explained in the post about Apache, I am going to start the Apache server on my computer from XAMPP. Doing this will create a web server which root is located in the C:\xampp\htdocs folder.
 For now in that folder I am going to place three text files as an example. This is how the contents of the C:\xampp\htdocs folder should look.

We know that the 3 files are stored in that folder because we see them there through Windows Explorer. Now we will try to visualize the content of that same folder, using a Web Client. I will use Mozilla Firefox.
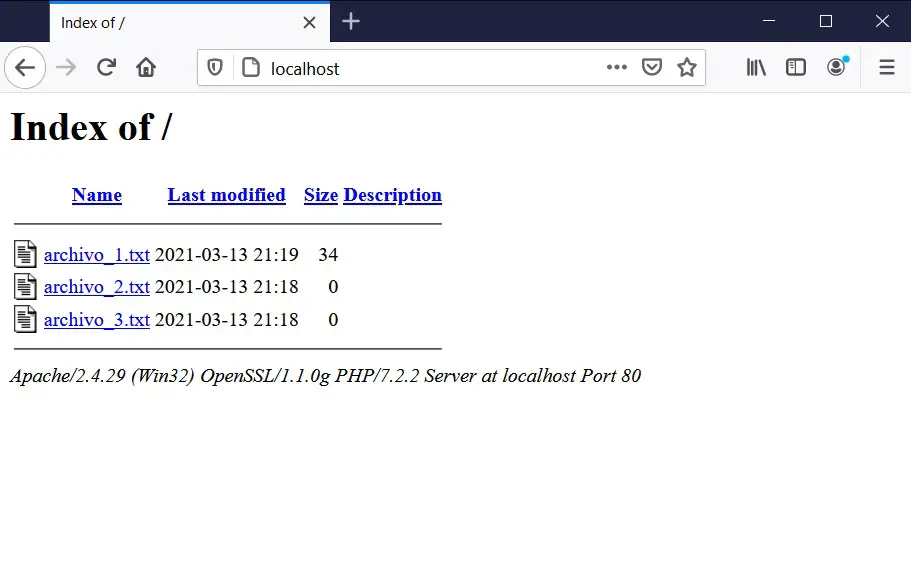
The address through which we access our local web server is http://localhost. When writing that in Google Chrome, the following result should appear:
As we can see in the image, the content of the C: \ xampp \ htdocs folder has appeared in our web browser. And that’s what the web server (Apache) does: it allows us to view the information stored in a folder on a computer from a web browser (Firefox, in this case). The same result would be obtained if you use Chrome, Safari, Opera or any other browser.
Localhost is the host through which we can access the Apache server locally. This host can change to refer to files that are stored on other servers. That is the purpose of web domains (the name of the web pages, the .com), to establish a link between clients and servers remotely, as well as the localhost allows us to establish a connection between a web client and a web server locally on our computer.
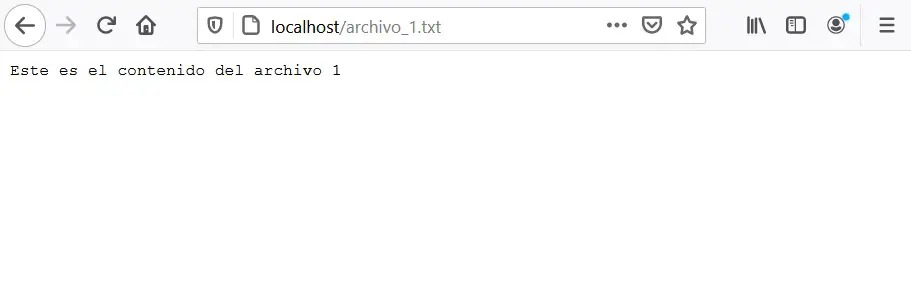
Going back to the example, if we click on the name of any of the files, we can see the content of the text file:
Web browsers also have the ability to interpret text stored in files on the server and convert it into visual elements. For this there is a programming language called HTML, which is used specifically to create interactive visual interfaces from plain text. Let’s look at an example.
Inside the file_1.txt I will place the following code:
|
1 2 3 4 5 6 7 8 9 10 |
<!doctype html> <html lang="en"> <head> <meta charset="utf-8"> <title>HTML test</title> </head> <body> This is the content of the HTML file </body> </html> |
Using Notepad, we edit the file.
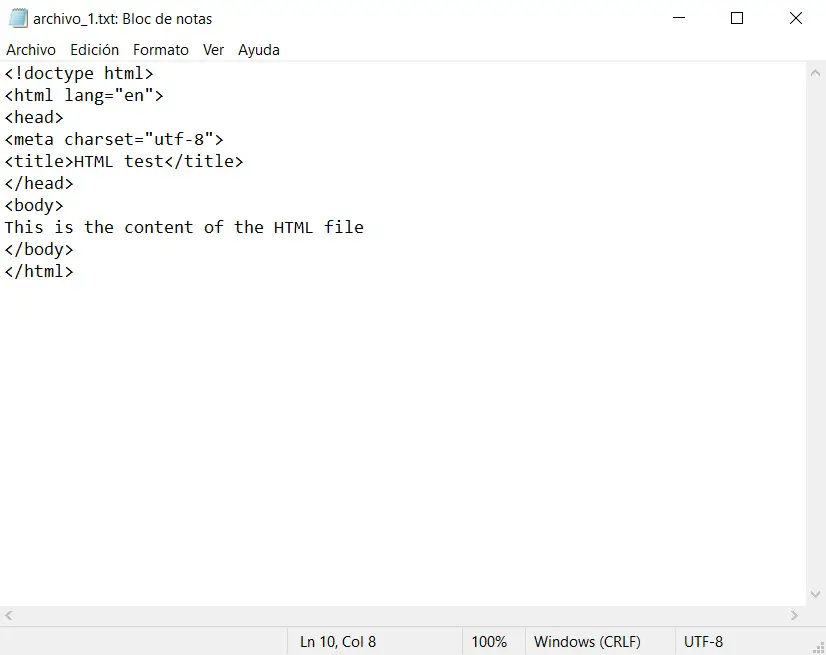 When we try to view this file in the web browser we will see:
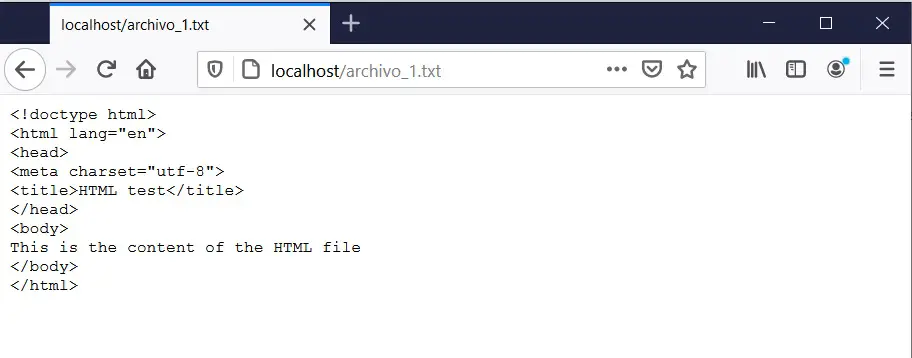 The same content. Why? Because .txt files are not meant to be rendered by the web browser. So if we change the name of the file to archivo_1.html we will see the following:
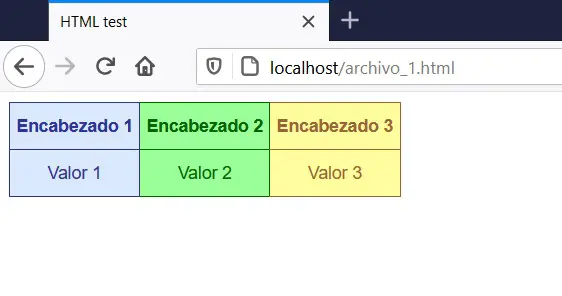
 Here we see how most of the code disappears and what appears between the <body> and </body> tags is simply displayed. But, instead of plain text we could make interesting things appear like tables, graphs, images, etc. I’m going to modify the text file and put a much more complex code in it:
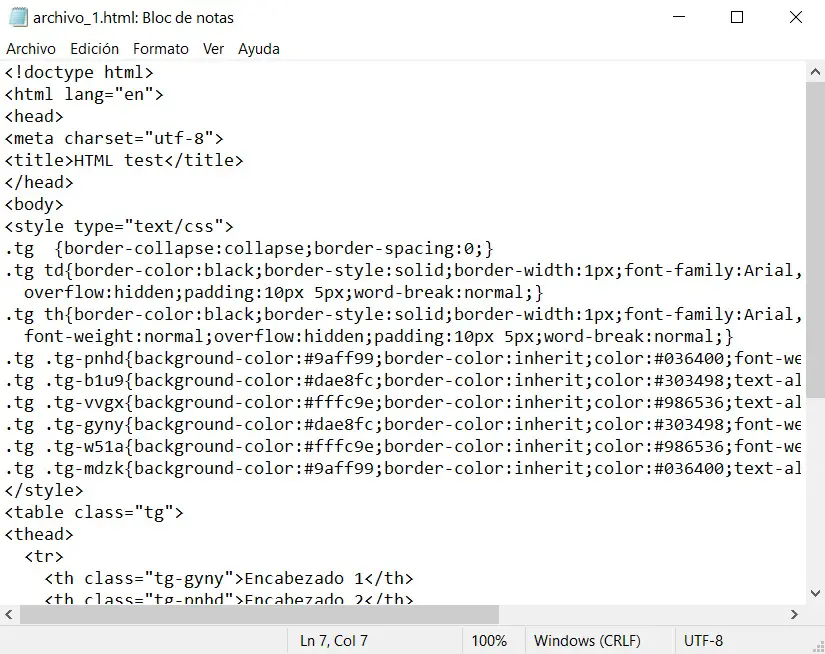 This time I have included some lines of CSS (cascading style sheet), with which you can create visual styles for your HTML code. The code was not written by me, but I generated it through a website: HTML Tables generator. When I see this code from the web browser we have:
What is shown is a simple interface of a table with two rows and 3 columns, with different font and background colors in the cells. This is how web pages are built, using a combination of HTML, CSS, and server-side programming languages, such as PHP, NodeJS, Python, Java, among others.
This is the basic principle of web pages. A website is nothing more than a collection of files hosted on a server, which users access through the hypertext transfer protocol (HTTP). The only thing that HTTP does is transmit the text stored in the files of the server to the web clients that send requests to the server. Web browsers are web clients that have the ability to transform HTML and CSS codes (among other things) into visual elements, that is, the web pages that users access.
There may be web clients that do not transform the code into visual elements, but simply receive the text and deliver it to you as it is. For example, if I use a Java web client and send a request to http://localhost/archivo_1.html, the result is the following:
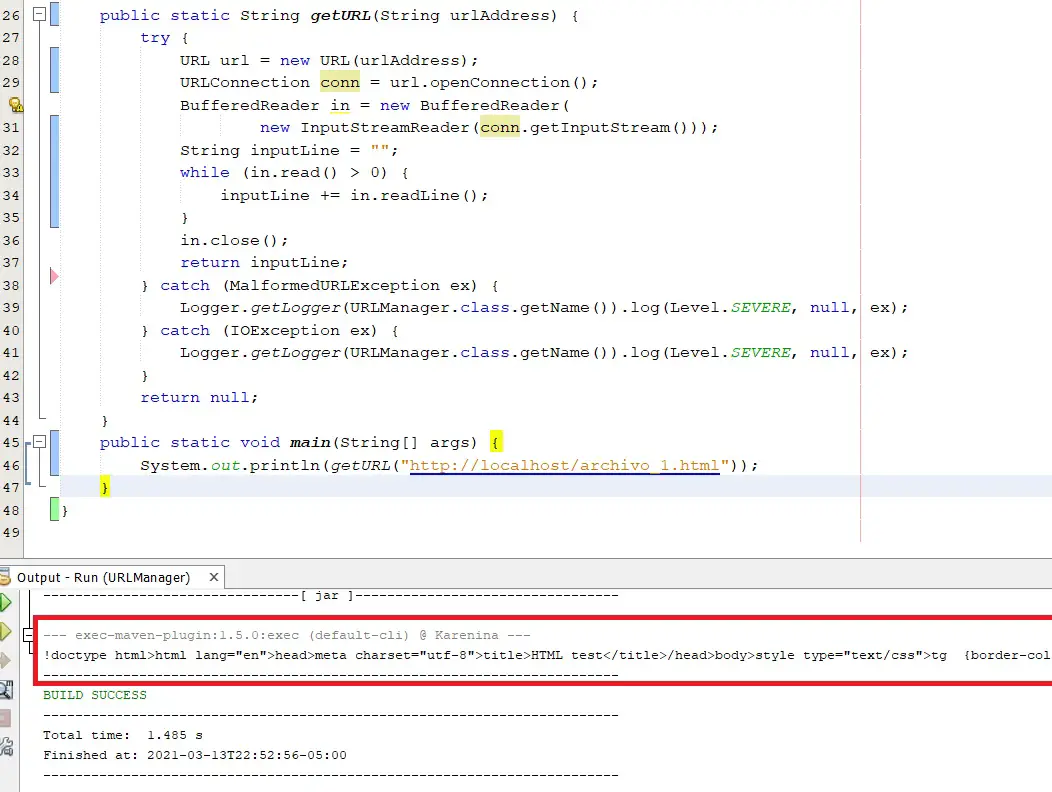 As I said, almost any web language allows you to configure a web client that sends requests to a server and receives text back. It doesn’t matter that we can’t see it rendered, that text works for us and we can do a lot of things with it.
Server-side programming languages
Server-side programming languages are programming languages that run on the server, where clients cannot see what is happening. Client-side programming languages (such as HTML and CSS) allow the client to visually see a result, but server-side do things that clients should not see. An example of these things is queries to databases, where private and completely confidential information is normally kept.
An example of a server-side web language is PHP. It is one of the most widely used languages in the world. Almost any web page on the Internet today bases some bit of its operation on PHP. Being an extremely easy to use language, I will show you an example of a PHP script being executed by a web browser.
I will create a file on my web server that will be called test.php, in which I will place the following code:
|
1 2 3 |
<?php echo("Hello world"); ?> |
When we access this file from the browser, we will see the following:
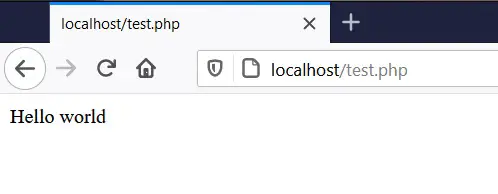 Basically that is PHP. Scripts are written in files with a .php extension that, when accessed from a web client, are executed and do something. Today many pages are built in PHP, which has the ability to be programmed to generate HTML dynamically. For example, if we want the table with the colors we made in HTML to appear when accessing the test.php file, we can tell PHP to open the HTML file, extract the text and send it to the browser. That can be achieved with the following code:
|
1 2 3 4 5 6 |
<?php $html = fopen("archivo_1.html", "r"); while ($line = fgets($html)) { echo($line); } ?> |
With this, what we do is read the HTML file and print each line of the file with the echo statement, which we have already seen is used to send text to the client. The result of accessing test.php with a browser is:
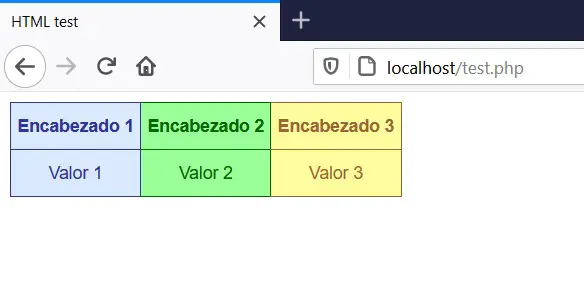 The same result as before, visually. Today most web pages are built like this, in pieces. In some files the styles are saved, in another the different parts of the page, in others the scripts for dynamic behavior and at the end one or more files in PHP are responsible for making the different pieces of code fit into a single text string , which is sent to the web browser. In this way we can watch videos on YouTube, search for things on Google or Wikipedia, buy things on Amazon, etc.
And it doesn’t have to be PHP who is in charge of putting together the page. It can actually be any other server-side language. Today there are many options for working in web development. In this post I am simply trying to share the most basic knowledge on this topic.
HTTP request methods
So far we know that HTTP allows us to access text files that are stored on a server, including language scripts that are executed when we make requests from a web client. But, so far we have only talked about receiving information. We have simply sent requests and received responses from the server in the form of hypertext, which we already saw can be interpreted by a web browser as visual elements.
In this new section we are going to try to communicate through HTTP requests. By this I mean that we are going to try to create a two-way communication with the server, in which we will send data and receive a response that will depend on the data we send.
Within the HTTP protocol there are several request methods, which I will mention below:
- GET
- HEAD
- POST
- PUT
- DELETE
- TRACE
- OPTIONS
- CONNECT
- PATCH
- MOVE
- MKCOL
- PROPFIND
- PROPPATCH
- MERGE
- UPDATE
Personally, I am not an HTTP expert, but I think I have the minimum knowledge required to address you through this post. From now on I am going to focus on explaining the two request methods that interest me the most for this post: GET and POST. These are the main methods used in HTTP transactions, but, as we have seen, they are not the only ones.
Since GET and POST are the most important methods for what I want to share in this post, I will base the rest of this post on those two methods and it will be up to you to study the other methods on your own, if you wish. From now on I will tell you that GET and POST are the most used, although since I am not an expert on this subject, I could be making a mistake.
The GET method
The GET method is the easiest to use and understand among the ones I have already mentioned. It is one of the most common methods and is used to request information from a specific source within the server. In order to understand the GET method, I will use a PHP script with which it will be shown how this method works.
With GET, information can be sent to the server through the URL used in sending the request. For example, if we access the following URL:
http://localhost/test.php?param1=value1¶m2=value2
With that we will be sending two parameters and two values (value1 and value2). This information can be received and processed in PHP. An example of this would be the following script:
|
1 2 3 4 5 6 |
<?php $val1 = $_GET['param1']; $val2 = $_GET['param2']; $str = $val1.' '. $val2; echo($str); ?> |
With that code snippet we can receive two values through the URL and print those two values in the web browser. If we save that code in the test.php file and test it, we will see the following result:
 We see that the two parameters that we send in the URL appear printed in the browser. If we write something else, we will see that the result changes according to the URL we use.
 We can also make that when receiving the parameters, PHP does something with them and returns an output result. For example, if we use the following code:
|
1 2 3 4 5 6 |
<?php $val1 = $_GET['v1']; $val2 = $_GET['v2']; $res = $val1 * $val2; echo($res); ?> |
Using this we will have made a small calculator that takes two values, multiplies them and gives us the result. When testing this script in our browser, we will see the following result:
Notice that we send two values, 5 and 10 and in the browser we obtained the product of them, that is, 50. We change the names of the parameters of param1 and param2 to v1 and v2, showing that there we can use any value we want . Other parameters/values could also be added to the URL, so that through the GET method a large number of values can be transferred to the server.
With this method it is very easy to send information to the server, but it also has its limitations. For example, the URL has a size limit of 2048 characters. It is also a very insecure method, since the information sent as a parameter travels in plain text form through the URL. The URLs used are stored in the search history and in the cache of the web browser, so the information sent can be easily traced from the browser.
If we are creating a web page where a user is required to set a username and password, this information should never be sent using the GET method. Anyone could be monitoring our web browsing and in the URL we send in our request it would be very easy to extract sensitive information, if the GET is used to send it.
The POST method
If what we want is to send large volumes of information without being tracked through the URL, without having size limitations and using a slightly higher level of security, for this we have the POST method.
With POST, the information is not sent via the URL, but is packed into the body of the request. Every HTTP request has a body in which certain information is sent. Using the appropriate tools it is possible to add information to the body of the request and then receive and process it in PHP.
The problem with POST is that we cannot construct it as simply as a GET request. We can test the GET directly from the web browser, but to build a POST we need to do it from some tool or programming language. To see how this method works, we will use the following PHP script:
|
1 2 3 4 5 6 |
<?php foreach ($_POST as $key => $value) { echo $key .": ".$value; echo(" "); } ?> |
This script, which I will save in test.php, will receive parameters from POST and print them to the web client. To test this script we must do it from a programming language. I will use the following Python script:
|
1 2 3 4 |
import requests pload = {'param1':'hello','paparam2':'world'} r = requests.post('http://localhost/test.php',data = pload) print(r.text) |
What this script does is create a JSON in which there are two parameters (param1 and param2) and two values (“hello” and “world”). That JSON is attached in a POST request and then the result returned by the test.php script is printed.
When we execute the code in Python we see the following result:
 This time instead of sending those two parameters I’m going to make the PHP script receive a certain amount of numbers and give you the sum of the amounts it receives. The script in PHP would be the following:
|
1 2 3 4 5 6 7 |
<?php $sum = 0; foreach ($_POST as $key => $value) { $sum = $sum + $value; } echo('El resultado es: '.$sum); ?> |
From Python I am going to send you 4 values: 10, 20, 30 and 40, whose sum is 100. Let’s see what the Python script would look like:
|
1 2 3 4 |
import requests pload = {'n1':10,'n2':20,'n3':30,'n4':40} r = requests.post('http://localhost/test.php',data = pload) print(r.text) |
The JSON in Python (stored in the variable pload) contains the parameters n1, n2, n3, and n4, with the values 10, 20, 30, and 40 respectively. Those values are passed to the test.php script via POST and then the result is printed. When running these scripts, we will see this:
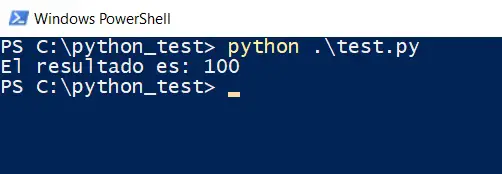 As we can see, when executing the script in Python we obtain the result of the sum of the 4 numbers that we send from Python. Instead of those 4 numbers we could send any type of information encoded in JSON and when we get to PHP we can have the information stored in a database or do many other interesting things.
Conclusiones
To understand what hypertext transfer protocol is, we first had to study the concepts of web server and web client. Within these concepts we saw that through the transfer of text is how Internet users can access web pages. Web browsers are web clients that are responsible for rendering the text received through HTTP and converting it into visual elements with which people can interact.
In this post we also go through a bit of server-side programming languages, mainly PHP. This was necessary so that we could study some examples of the use of the GET and POST methods, two of the main functions of the HTTP protocol.
With the GET method, the data can be sent through the URL used to make the HTTP request. This method is easy to use, but it is not secure and has limitations in terms of the volume of information that can be sent.
The POST method is more secure and lacks the limitations of the GET method, but it is a bit more difficult to use than GET. Although to use GET it is sufficient to have a web browser, to use POST requires special tools or the use of a programming language. Fortunately, almost any programming language has tools for sending HTTP requests, including Python.
Using Python we configured some requests with POST and sent them to PHP, with which we were able to verify that the transfer of information between client and server is fulfilled. Now what we have left is to assimilate the knowledge that we have acquired in this post and try to do interesting things with what we have learned.
Although there are still some things to learn about HTTP, what we have seen here is the most basic on this subject and the minimum knowledge necessary to work on electronics projects that include data capture and storage systems. The information read by the sensors of an electronic circuit can be sent to a web server using the GET and POST methods for data transfer. But we will talk about that topic in another post.
I hope that the information presented is to your liking and usefulness. Any comments or questions leave it to me in the comment box.


